
City of secrets passage of the stomach. Walkthrough Horizon: Zero Dawn

We offer you a complete guide to the passage of the game "Secret Investigations. Ghost Town: Collector's Edition".
Also, this game is found under the name "The X-Files. Mystery of the Misty Lake".
Original title - Strange Cases: The Secrets of Gray Mist Lake.
If you still have questions about how to complete the game "Secret Investigations: Ghost Town" - write on the forum.
*all pictures are enlarged by clicking on them
Part I
Hidden objects in each game are given randomly, so it is impossible to make universal screenshots.
Use hints if necessary.
1. Look into the hollow tree and do a Hidden Object Scene (to do this, first take a green card).
Get fittings.
2. Look into the broken car.
- Read the newspaper.
- Use fittings to open the glove compartment.
Examine the open glove compartment and take torch and jack.
- Shine flashlight rune stone.
3. Put on the stump rune stone and then take letter G.
Talk to the sentinel ghost that appears to receive the quest - fix the sign.
4. Take letter M.
5 Zoom in on the sign. Read the note pinned to it and take the fallen letter L. Return to places letters G, M, L.
The sign should read "GreyMistLake". After that you will receive a new task - explore the city.

Follow Sam forward and to the right.
When you get into the city - turn left on the arrow (the arrow will be in the lower left corner), and then climb into the window.
1. Shine flashlight on a clot of shadow, and when it disperses, take rune stone.
2. Click on the mirror to get a new task - find a ghost.
3. Zoom in on the sewing machine and take file.
Follow the arrow forward.

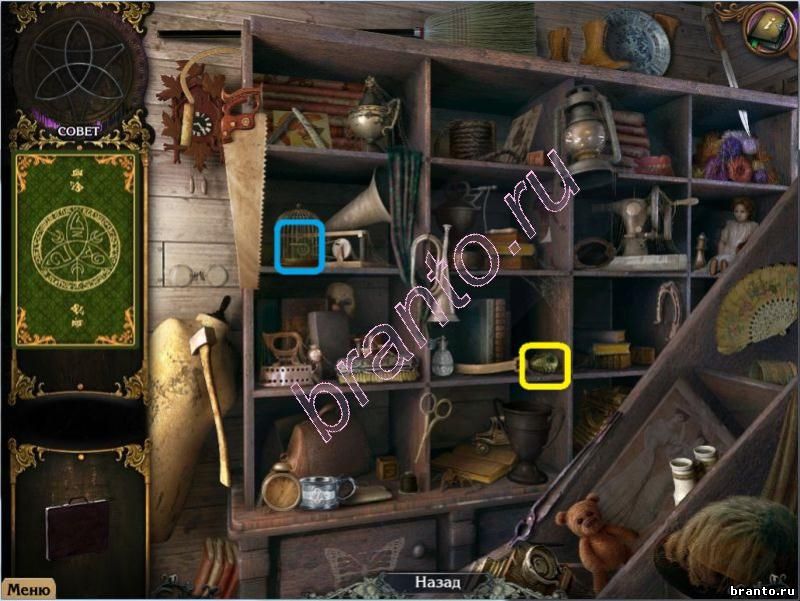
Examine the cabinet shelves.
Use file to take the card out of the birdcage.
snake head.
Examine the door handle.
Insert into place snake head, then press the door handle again.
A mini-game is activated.
Hold the snake's tongue with the mouse and move it in the following order: left, up, right, left.
If you do everything right, the eyes of the snake will light up with green fire.
If you make a mistake - orange, in this case the whole sequence must be repeated again.
After completing the mini-game, go through the opened doors.
1. Look at old photos.
2 Zoom in on the chest of drawers.
Collect the photo, then take button and butterfly.
Climb up the stairs.


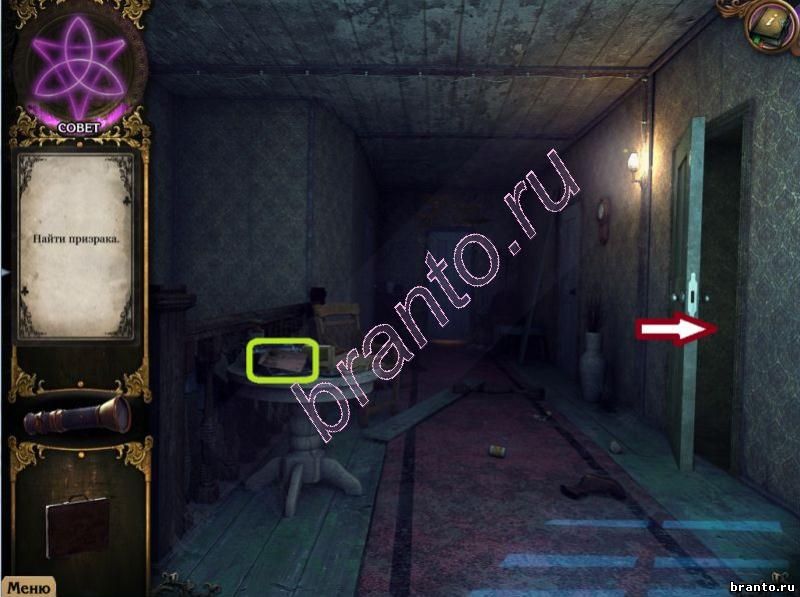
Read the newspaper on the table and then go through the nearest door on the right wall to the bedroom.
1. Shine flashlight on a clot of shadow, and when it disperses, take rune stone.
2. Zoom in on the old piano and play a mini-game by repeating the sequence of keys pressed:
-B-G-F
-B-G-F-A-E
- B-G-F-A-E-D-C
When finished, take the appeared stained glass part.
3. Look out the window.
4. Zoom in on the mannequin and take wire cutters and handle.
Look at the photos in the hands of the mannequin.

Follow the down arrow to return to the corridor and zoom in on the door leading straight ahead.
Take a second stained glass part.

Follow the arrow down 2 times to return to the hall of the first floor.
Use handle on the door to the left of the chest of drawers.
The door will open, go to the store.
1. Shine flashlight on a clot of shadow, and when it disperses, take rune stone.
2 Zoom in on the display case to start a Hidden Object Scene.
Zoom in on the wallet and insert the missing piece into the center of the picture. butterfly.
Take a green card from the opened wallet.
Collect all the items, among which will be wing.


Follow the down arrow to return to the hall, climb the stairs to the second floor and zoom in on the door leading straight ahead.
Above the door is a puzzle.
Paste in an empty space wing, and then swap the wings of the creatures.
If the wings are set correctly, the eyes will light up blue.

After completing the mini-game, the door will open, go into the office.
1. Take the mannequin head from under the table.
2. Zoom in on the round ritual table.
Insert 3 rune stones into the red circles.
Click on the heads of the snakes in the following order: bottom, left, right.
Take the third stained glass part.
3. Talk to the ghost that appears, after which a new task will be added - find Sheriff Shepard.

Go down to the first floor and go through open door to the store.
1. A new hidden object area has appeared in the showcase. Collect everything to get the fourth stained glass part.
2. Zoom in on the door and position it correctly 4 parts stained glass.
The color of the flower on the stained-glass window should match the color of the round border.
If the stained-glass windows are placed correctly, then the door will open - go outside.

Talk to the ghost of the driver, he will ask you to fix the carriage.
Go back, down arrow 3 times.
bank.

Enter the hall through the door.
Zoom in on the old photos on the wall. Use bank to catch fly.

Go outside to the ghost cabman, and then turn right in the direction of the arrow. You will arrive at the scene of the accident.
A Hidden Object Scene appeared in the hollow of the tree on the right side.
To get a green card - give it to the spider sitting in the upper right corner, fly.
Upon completion of your search, you will receive knitting needles.
Follow the forward arrow to return to the carriage.
1. Approach the broken wheel and use on it knitting needles. take the whole wheel.
2. Zoom in on the back of the carriage. Substitute under the carriage jack and then use fittings on the jack. When the carriage rises - return to the place wheel.
3. The ghost will disappear, zoom in on the carriage door and solve the puzzle by collecting the pattern on the doors. A Hidden Object Scene will appear in the open doors of the carriage. The green card is on the seat, next to the large hourglass. Upon completion of your search, you will receive hacksaw.

Follow the arrow forward through the gate to the statue.
Take chest key and go to the sheriff's office.

After talking with the sheriff, you will have a new task - find a letter.
1. Zoom in on the window and take jewelry box.
2. Zoom in on the rifle and then use wire cutters to cut the straps. Take rifle yourself.
3. Look at the missing Angela Bishop notice on the bulletin board.
4. Use rifle to open the door to the prison cell.

hacksaw saw through the handcuffs and take mannequin arm.

Zoom in on the male mannequin and put it back in place mannequin head and mannequin arm. After that, a puzzle will open in the chest, in which you need to correctly arrange the gears.
The mannequin will move to the side and open the closet for you, in which there is a Hidden Object Scene. Use chest key
on the box to get a green card. At the end of the search will be added to your inventory butter dish.


Go to the prison cell.
Examine the castle and use on it butter dish. Click on the key to turn it and open the lock.
The ghost will disappear and a Hidden Object Scene will open behind it. To find a green card - wire cutters cut the picture on the wall. At the end of the search, a second one will be added to your inventory. button.

Exit the police station and go to the store.
1. Zoom in on the cash register and slide it into place 2 buttons. At the bottom of the cash register there is the letter "H" - You need to press the buttons to draw the letter H. Pull the handle and take it from the cash register ruby eye and gear.
2. A new hidden object area will open in the closet. Collect everything to get puzzle piece- button 5.


Exit the store to the hall, go up the stairs to the second floor and enter the office through the door right along the corridor.
Zoom in on the drawer on the table, put it in place gear and pull the handle. Take from the drawer strange device.

Go outside to the carriage.
In the carriage - a hidden object area. To get a green card - use jewelry box
on the box. At the end of your search, you will receive jug.

Go to the police station.
Zoom in on the water barrel.
Use strange device
on the lid to open it.
Take from the barrel toy boat.
Lower jug in a barrel to get jug of water.

Enter the precinct.
Zoom in on the window and water the flower from pitcher of water. Flowers will bloom by writing the number " 853
".

Go to the prison cell.
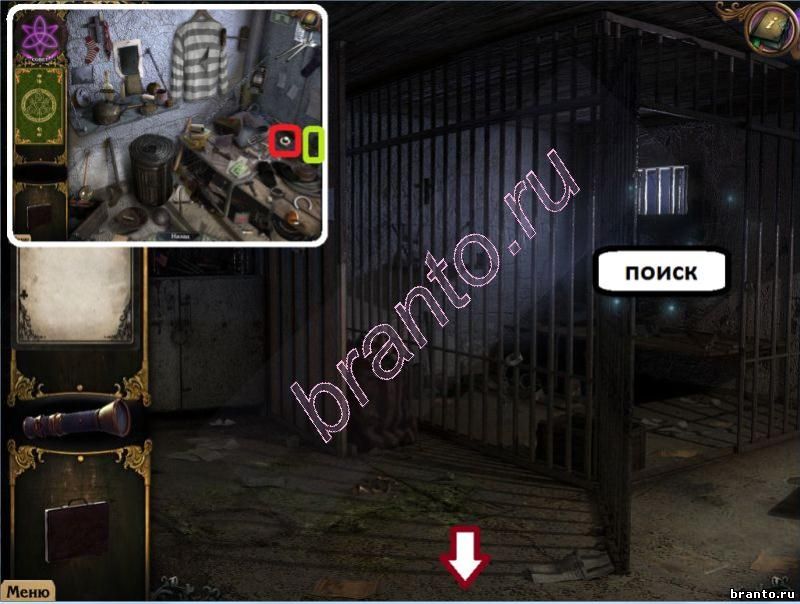
Complete a Hidden Object Scene to get safe handle.
Return to the sheriff's room.
Zoom in on the safe, put it in place safe handle and dial the code 853
. From the opened safe, take sheriff's letter.
After that, a new task will appear - give the letter to Violet.

Go to the house, go up to the second floor and enter the office through the door right along the corridor.
Give back sheriff's letter girl, in gratitude, lovers will leave for you on the floor snake key.
For all the toy lovers of the "I'm looking for" genre who have encountered difficulties in walkthrough of the game "Secret investigations 3. Ghost town(Strange Cases: The Secrets of Gray Mist Lake)" I suggest you read this description of the game.
Chapter 1: Letter from the Sheriff.
Click on the card in Claire's hand.
Click on the hollow tree on the right to search for items.
Click on the green card in the upper right (A) to display a list of items.
Find items from the list.
Rebar in inventory (B).
Click on the door of the broken car.
Read the newspaper (C) on the seat.
Open the diplomat (D) with inventory and fittings and break open the glove compartment of the car (E).
Examine the glove compartment and take the flashlight and jack from it (F).
We click on our flashlight and aim it at a clot of darkness behind the driver's seat.
Take STONE WITH RUNE (G).

We leave close-up by clicking on the arrow at the bottom of the screen.
Pick up the letter M from the ground (H).
We approach the stump, put a stone with a rune on it and take the letter G (I).
We speak with the emerging ghost.
We examine road sign, take the letter L (J) and place it on the sign.
Read the note attached to the clue sign (K).
We insert the letters G and M (L) into their places on the sign.

We go forward along the opened path for Sam.
We have the opportunity to go along any of the three paths.
We go right to the city.
Turn left (M) and read the newspaper pinned to the wall of the building (N).
Squeeze through the window into the house (O).

Use the flashlight on the cloud of darkness to take the RUNE STONE (P).
Examine the sewing machine and take the saw (Q).
Look in the mirror (R) to see a ghost there and get a new task.
Go forward to the mannequins (S).
We click on the sparkling shelves on the right to search for items from the list.
Zoom in on the birdcage and use the file to open the cage door and take the card.
We find all the items on the list to get the head of the snake in inventory.

Click on the door on the left and insert the snake head into the lock (V).
Click on the door again to activate a puzzle.
We need to drag the snake's tongue down, left, up or right (W).
When we pull the tongue in the right direction, her eyes will glow green.
My option was this: right, up (towards the door), right, left.

We enter through the door into the next room.
Zoom in on the chest of drawers on the right to start a puzzle.
Take the button (X) from the chest of drawers.
Restoring the photo by placing the parts in a frame.
Pieces placed correctly will lock in place.
The solution to the puzzle is shown on the screen (Y).
Take the BUTTERFLY from the opened drawer (Z).

We rise along the stairs to the corridor of the second floor.
Meet the witch.
We look at the table and read the newspaper.
We enter the right door.
Use the flashlight on the cloud of darkness to take the stone with the rune (A).
Click on the bed and take the SCISSORS and PEN (B).
Click on the old piano to access a puzzle (C).

You must press the keys in the correct order (D).
Combination 1: B, G and F.
Combination 2: B, G, F, A and E.
Combination 3: B, G, F, A, E, D and C.
We take part of the stained-glass window.

Click on the window to view the video clip.
We leave the room and go down (back twice).
Examine the door, insert the handle into it and go forward to the room with the cash register (F).
Use the flashlight on the cloud of darkness to take the stone with the rune (G).
We click on the women's handbag, insert a butterfly and take a card with a list of items.
We find all the items on the list to get the bat wing.
Let's go back to the corridor of the second floor.
We go to the end of the corridor.
We take part of the stained-glass window on the chair.

Zoom in on the birds over the door; place the bat wing on the empty space for a puzzle (J).
We will arrange the wings correctly for each bird.
If the wings are installed on the bird correctly, then its eyes will light up.
The solution to the puzzle is shown in the screenshot (K).
We enter the opened door.

Take the MANNEQUIN HEAD (L).
Examine the table; place the rune stones in the glowing circles for a puzzle (M).
Click on the snakes in the following order (1-3). See screenshot.
We take part of the stained glass window (N) from the table, we communicate with the ghost and we get a new task.
We go down (back three times) and go through the open door.
Click on the sparkling area on the left for a hidden object scene.
We take a card with a list of items on the right.
We find all the items on the list to get a part of the stained glass window.
We approach the stained glass door and insert 4 parts into it in accordance with the color of the part.
We go through the opened door.
We watch the video, and then we go to the right to the car.

Click on the hollow tree.
We click on the spider guarding the map to find out that we must feed it.
We exit the close-up.
We go forward to the carriage with the ghost, and then three steps back (three times we click on the arrow at the bottom of the screen).
We click on the sparkling area to search for items from the list.
Take a card with a list of items at the bottom, next to the goblet.
We find all the items on the list to get a jar.

We go through the door to the left to the stairs.
Zoom into the portraits on the far wall and use the can to catch the fly (U).
We leave the house to the street and go right to the car.
We click on the hollow of the tree, give the fly from the can to the spider and take a card with a list of items.
We find all the items on the list to get knitting needles in inventory.

We go forward to the carriage.
Zoom into the wheel to the right of the ghost, insert the spokes into it and take it into inventory (A).
Click on the carriage and place the jack under it (B).
Insert a piece of reinforcement into the jack (C) to raise the carriage.
Insert the wheel into place (D).

Click on the carriage to start a puzzle.
By clicking on the squares, we restore the picture. Solution in the screenshot (E, E, F, F, F, G, G).
We enter the carriage to search for objects.
We take a card with a list of items on the seat.
We find all the items on the list to get a hacksaw.

We go forward to the monument.
Examine the base of the statue and take the chest key (K).
We go to the sheriff's office.
Zoom into the gate (L) and the barrel (M).
Enter the Sheriff's Office (N).

Talk to the sheriff to get a new task (O).
Examine the window sill; take the decoration for the box (P) and click on the flower vase (Q) - the color needs to be watered with something.
Zoom into the rifle, cut the straps with the scissors and take the rifle into inventory (R).
Zoom in on the board (S) on the left behind the sheriff.
Click on the grate door on the left and shoot the lock with the rifle (T).
We go to the door.

We communicate with the ghost in the chamber.
We will approach the hand of the mannequin and cut the handcuffs with a hacksaw.
Take the MANNEQUIN HAND (U).

We go back 5 times.
Place the head and HAND on the mannequin (V).
Click on the mannequin to start a puzzle.
Arrange the gears in such a way that they all rotate. The solution can be seen in the screenshot (W).
The mannequin opens the wardrobe.
Search for items.
We examine the box, open the lock with a rusty key and take the CARD.
Collect all the items from the list to end up with an oil can.

We return to the prison cell.
Click on the camera lock, use the oil can and select the key (A).
Select the sparkling area for a Hidden Object Scene (B).
Cut the poster with scissors and take the CARD (C).
Collect all the items from the list to end up with a BUTTON (D).

Zoom into the cash register and insert the 2 BUTTONS (E) for a puzzle.
We click on the buttons of the device to get the letter 'H'.
Turn the handle (F) to open the cash register.
The solution is in the screenshot (G).
Take the RUBY EYE and the GEAR from the cash drawer (H).
Click on the cabinet to search for items from the list.
Take the CARD (I) in the lower right.
Collect all the items from the list to end up with a button with a number (J).

We go back, go up the stairs and go forward twice.
Click on the box and insert the GEAR (K).
Click on the handle (L).
Look at the box and take the DEVICE (M).
We return to the carriage to search for items from the list.
We place the lid on the box, take the CARD.
Let's collect all the items from the list to end up with a jug.

We go forward to the sheriff's office.
Click on the barrel; put the DEVICE on the lock (P) and take the TOY BOAT (Q).
Place the jug in the water (R).
We return to the camera to search for items from the list.
Take the CARD on the bench.
Collect all the items from the list to end up with a HANDLE from the safe.

We go back to the sheriff.
Click on the window sill and water the plant with the jug (U).
Flowers in a pot form 853.
Zoom into the safe and insert the HANDLE (V).
We enter the code 853.
Examine the inside of the safe and take the LETTER (W) from the SHERIFF.

We go back 5 times, go up the stairs and stomp forward twice.
Give the SHERIFF'S LETTER to Violin's ghost (X).
Take the SNAKE KEY on the floor (Y).
We return to the sheriff's office.
Go to the gate on the right, click on the lock and insert the SNAKE KEY (Z).
We go to the gate.
Chapter 2: The Butcher's Daughter
Click on the person.
Let's go ahead.
Click on the wheel to search for items from the list.
We cut the shrub at the top left with scissors and take the MAP.
Collect all the items from the list to end up with a CHAIN.

We go back and click on the door of the butcher's house.
Place the CHAIN on the gear on the left (C).
Click on the gear to start the puzzle.
Click on the gears in this order: 1, 2, 1, 3 and 2.

We go in the door.
Look at the pictures on the wall (A).
Take the CLEVER (B).
Go to the room on the left (C).

Use the LANTERN on the shadow; take the RUNE (D).
Examine the freezer; take the CLOWN HANDLE (E).
Click on the fabric and take the NAIL (F).
Click on the butcher's desktop to search for items from the list.
Place the RUBY EYE on the side of the table to end up with a CARD (G).
Collect all the items from the list to end up with the STONE BOOK (H).

We leave the butcher's house and go forward.
Place the STONE BOOK on the gate (I).
Look at the gate; take the TWEEZERS (J).
We return to the sewing store.
Click on the box on the table; use the tweezers to get the number button (K).

We return to the school gates.
Click on the gate and insert the two buttons with numbers on the playing field (L).
Arrange the numbers on the buttons so that they correspond to the sums on the edges.
The number 7 is already in place.
The solution is shown in the screenshot (M).
- First horizontal Row: 6, 5, 3
- Second horizontal row: 2, 7, 4
- Third horizontal Row: 1, 9, 8.

We go to the gate.
Click on a big tree take PAPER and BUTTON (N).
Click down and enter the school.
Give the TOY BOAT to the ghost of the little boy (P).
Click on the shelf with toys to search for items from the list.
Place the CLOWN HANDLE on the box and take the CARD.
Collect all the items from the list to end up with a FLAG from the MAILBOX.

We go to the left, into the classroom.
Click on the window to start the game of tic-tac-toe (S).
Click on an empty spot to draw an 'X' and so on.
You need to play 3 times to finish the game.
We get the KEY from the attic.
The words "crows are afraid of the bell" will appear on the board (T).
Examine the notebook on the desk; insert the piece of drawing from the inventory (U).

The word "CAT" will appear.
We leave the room.
Examine the suitcase for a puzzle (V).
Using the hint from the book, arrange the symbols in such a way that the word "CAT" is obtained.
Screenshot solution (W).
Take the bell tongue from the suitcase (X).

We leave the school.
Click on the attic door in the upper right and use the KEY on the lock (Y).
I'm going to the attic.
Click on the ghost.
Click on the sparkling area on the right to search for items from the list.
Click on the typewriter; insert the ENTER BUTTON (A).
Click on the button and take the CARD (B).
Collect all the items from the list to get the HAMMER (C).

Examine the brick wall in front of us; insert the nail between the bricks (D).
Hit the hammer on the nail (E) and take the FREEZER PIECE (F).
Climb up to the bell (G).

Cut the ROPE with the hatchet (H).
Place the bell tongue on the bell (I).
Click on the bell to scare the crow; take the RUNE (J).

We go down and communicate with the ghost.
We go back twice.
Zoom into the mailbox; insert the FLAG and take the FREEZER PIECE (K).
Read the note (L).
Select the bike for a Hidden Object Scene (M).
We take the CARD in the center.
Let's collect all the items from the list to end up with a rabbit.

We return to the room of the Butcher's shop.
Click on the freezer on the left; insert the 2 FREEZER pieces into place to start a puzzle.
Solve the puzzle by clicking on the arrows.
Solution U, R, D, D, L, U, R, D, L, L, U, R, R, D, D, L, D, D, R, U, L, L, D, R, D , L, D, D, R and U.
Open the chest and take the FROSTED RABBIT (P).

We return to the classroom at school.
Put the FROSTED RABBIT on the stove to get the second rabbit (Q).
We leave the room.
We take the CARD at the bottom center.
Let's collect all the items from the list to eventually get the KEY.

We leave the school and click on the big tree.
Zoom in on the rabbit house doors and place the 2 RABBITS on the doors (T).
Take STONE RUNE (U).
We return to the attic.
Take the CARD at the bottom right.
Let's collect all the items from the list to eventually get the 2nd KEY.
We return to the Butcher's room.
Let's examine the butcher's desktop to search for items from the list.
We take the CARD at the bottom center.
Let's collect all the items from the list to eventually get the GOLDEN KEY.

We return to the attic.
Examine the table with the bundle and insert all three keys into the locks (A).
Place the 3 RUNES on the circles (B) and take the DOLL from the cage (C).

We return to the butcher's house.
Give the DOLL to the butcher's ghost (D).
Take the RAVEN KEY on the floor of the room (E).
We go back three times and approach the gate on the left.
Examine the gate and insert the Raven Key into the keyhole (F).
We pass through the opened gate.
Chapter 3: Undertaker.
Examine the tombstone and take the DISC (A).
Click on the door and take the shovel (B).

We enter the house through the door.
We see that all the clocks in the house show 10:10.
Place the DISC on the clock, pull the chain down and take the CARD.
Let's collect all the items from the list to end up with arrows.

We leave the house and go left.
Examine the fountain and take the RING (E).
We go back twice.
Click on the gate and insert the arrows into the dial to start the puzzle.
Set the same time on the clock (10:10) (F).

We enter through the gate to the cemetery.
Use the shovel to dig up the coffin (G).
Open the coffin lid for a Hidden Object Scene (H).
Place the RING on the skeleton's hand and take the CARD.
Collect all the items from the list to end up with a HANDLE.

We go back and to the left.
Zoom into the hospital door and insert the HANDLE (K).
Examine the door again and take the yellow puzzle piece (L).

We go back, then to the right, we approach the building.
Click on the lock to start a puzzle.
Insert the yellow puzzle piece into the lock.
Place the chips with the symbols in the center on the opposite ends of the castle (M).
Walkthrough of the puzzle: 4-5-2-1-4.
Take the PUZZLE PIECE (N).

We return to the hospital.
Click on the door; put the jigsaw PIECE in place to start a mini-game.
Click on the pieces to rotate the images.
Screenshot solution (O).

We go to the hospital.
Use the lantern on the shadow and take the STONE RUNE (P).
Go through the door on the left to enter the operating room (Q).
Click on the mannequin (R).
Click on it again and take the DOCTOR'S ROOM KEY (S).

We leave the room and click on the door on the right.
Insert the DOCTOR'S ROOM KEY into the lock (T).
Click on the handle and go through the door (U).
Zoom into the drawer, open it and take the DENTAL FORCEPS (V).
Select the shelf for a Hidden Object Scene (W).
Place the DENTAL FORCEPS on the denture and take the MAP.
Collect all the items from the list to end up with the ELEVATOR HANDLE.

We leave the room and examine the elevator at the end of the corridor.
Place the ELEVATOR HANDLE on the door (A).
Click on the handle and enter the elevator.
Take the hand (B).
Click on the handle and exit the elevator as soon as it stops (C).

Use the lantern on the shadow; take the STONE RUNE (D).
Click on the cabinets for a puzzle (E).
Click on the arrows to move the panels.
Place the panels in the order you can see on the wall (F).
The solution is in the screenshot (G).
Select the shelf for a Hidden Object Scene (H).
We take the MAP in the lower center (behind the bulb).
Let's collect all the items from the list in order to eventually get a SCREW.

We return to the elevator and press the handle.
Exit the elevator and enter the door on the right.
Examine the snake on the table and place the hand on the snake (K).
Take KEY 1 (L).
Use the CROWBAR on the door and enter the second doctor's room (M).
Let's talk to the doctor.
Click on the table to search for items from the list.
Take the MAP on the side of the big clock.
Collect all the items from the list to end up with a SCREWDRIVER.
We return to the cemetery.
Click on the coffin to search for items from the list.
We take the MAP at the bottom near the coffin.
We will collect all the items from the list in order to eventually get a plate.

We return to the hospital.
Click on the gramophone and insert the record into it (R).
Take the RAG on the bench (S).

We go to the hospital and ride the elevator.
Examine the mechanical skeleton (T).
Use the screwdriver to remove the four screws (U).
Click on the buttons in the correct order, as shown in the screenshot (1-4).

Click on the areas so that they change color, all become green (V).
Click on the arrows until they are all on the left side.
To solve, click on the next arrows 1, 2 and 3.
Take the SCALPEL (W).
Click on the poster and cut it with the SCALPEL (A).
Take the HEART HALF (B).
We return to the cemetery.
Click on the statue and insert the HEART HALF in its palms (C).
Take the plate (D) at the base of the statue.

We go back twice.
Examine the pedestal and insert the sign (E).
Zoom into the statue's arm and take the GEM (F).

We go to the gate.
Enlarge the tombstone.
Cut the shrub with the hatchet (G) and insert the GEM into the hole (H).
Take the green puzzle piece (I).

We go right and approach the building.
Place the green puzzle piece on the lock.
Move the green part to the position shown in the screenshot.
Passing the puzzle: click on 4-1-2-5-3-2-1-4.
Take KEY 2 (J).

We return to the second room of the doctor in the hospital.
Click on the safe and insert the keys into the lock (K).
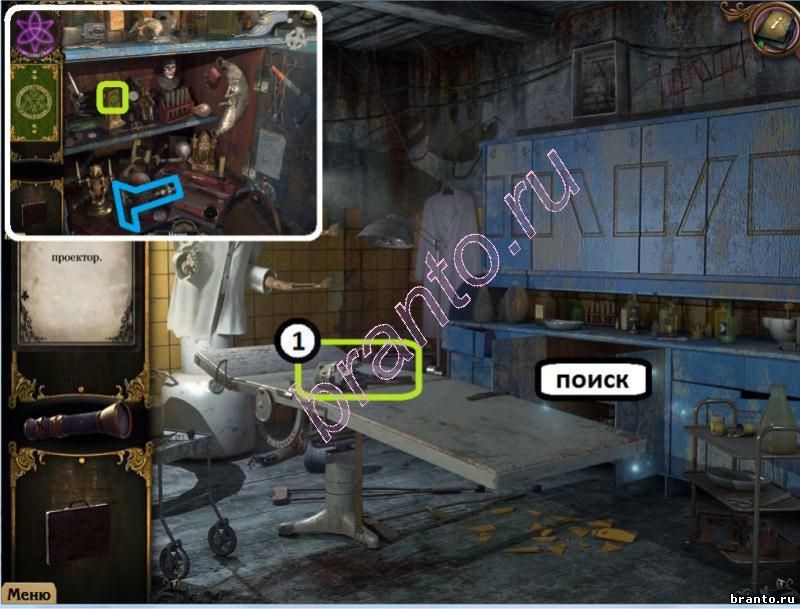
Take the PROJECTOR from the safe (L).
Place the RAG on the wall (M).
Place the PROJECTOR on the tripod (N).
We leave the room.
Click on the shelf to search for items from the list.
Let's collect all the items from the list to end up with a valve.

We go outside.
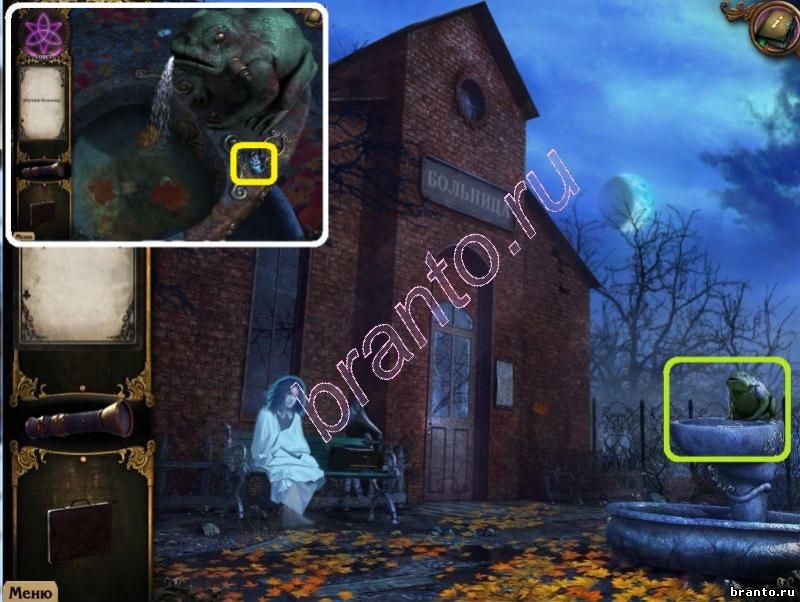
Click on the fountain and insert the valve (Q).
Take the BLUE PUZZLE PIECE and the TOOTH (R).

We return to the building in the cemetery and click on the lock.
Place the blue puzzle piece on the gate.
Insert the blue piece as shown in the screenshot (S).

Passing the puzzle: press 2-3-4-1-2-5-6-4-3.
Take the CLOCK PIECE (T).
We return to the hospital and go down in the elevator.
Click on the sparkling area to search for items from the list.
Take the CARD on the second shelf.
Collect all the items from the list to end up with a LEVER.

Examine the head on the table; insert the TOOTH into the mouth (W).
Take CUTTERS (X).
We take the elevator up.
Zoom in on the grate at the bottom right and use the wire cutters to cut the mesh (Y).
Take film strip (Z).

We go in the right door and into the second room.
Place the film in the projector (A).
We leave the room.
Pull the carpet and look under it (B).
Insert the LEVER into the slot (C).
Click on the lever and take the battery (D).

We return to the operating room.
Zoom in on the teddy bear, insert the battery and take the CLOCK PIECE (E).
We return to the cemetery.
Use the CLIPPERS on the coffin chains (F).
Use the lantern on the shadow and take the STONE RUNE (G).

We return to the undertaker's house.
Click on the base of the clock and insert the 3 STONE RUNES into the slots (H).
Examine the top of the clock; put the PARTS from the clock back in place for a puzzle (I).

The snake's head cannot be moved.
Click on the arrows to rotate the puzzle (J).
Click on the tiles to move them to an empty space.
Passing the puzzle: 5-4-3-2-1-5-4-3-2-1-5-4-3-2-1-5.
Screenshot solution (K).

Take the SPIDER KEY (L).
We return to the building in the cemetery.
Zoom into the gate and insert the SPIDER KEY into the lock (M).

Let's go ahead.
Turn on the flashlight to see through the devil's shadow.
Click yes on two runes to see their symbols.
We remove pairs of identical characters.
We remove all the runes to defeat the witch.
Hooray! Game completed.
You are familiar with walkthrough of the game Secret investigations 3. Ghost town. Leave your feedback in the comments to the game.
We offer you a complete guide to the passage of the game "Secret investigations. Ghost town".
Also, this game is found under the name "The X-Files. Mystery of the Misty Lake".
Original title - Strange Cases: The Secrets of Gray Mist Lake.
If you still have questions - write on the forum.
*all pictures are enlarged by clicking on them
Part III
Hidden objects in each game are given randomly, so it is impossible to make universal screenshots.
Use hints if necessary.
After the reunion of the butcher with his daughter, a new task will appear - open the raven gate.
Go to the entrance to the police station. Click on the gate to the left of the entrance and then use crow key to open them.
Pass through the gate, after which you will receive a new task - find the undertaker.
1. Approach the grave and take clock face.
2. Near the door, take shovel and enter the house.

You will receive a new task - explore the hospital.
Examine the undertaker's table by the clock wall. Please note that all clocks show the time 10:10.
Paste clock face into the cuckoo clock and pull the right cord to get a green card. Collect all the items, among which will be arrows.

Go outside and follow the arrow to the left towards the hospital.
After talking with the ghost, zoom in on the fountain and take ring.
Follow the down arrow to return to the undertaker's house and follow the arrow to the right.
Insert into watch arrows and set the time to 10:10.

Go through the opened gate.
Use shovel on a fresh grave to dig out a coffin. Click on the coffin lid - a Hidden Object Scene will appear in this place. To get a green card - put a skeleton on your finger ring. At the end of your search, you will receive handle.

Return to the hospital.
Use handle on the door, and when the door opens, look in there and take the yellow part of the puzzle.
Go back to the graveyard and zoom in on the ruined building behind the Spider Gate.
Insert into the castle the yellow part of the puzzle
and solve the puzzle by clicking on the round pieces until a compartment opens. Take puzzle piece.
Return to the hospital again.
Approach the front door and insert puzzle piece.
Twist the bars starting from the top until you collect the picture.

Get inside.
Shine on flashlight rune stone.
Enter the operating room through the left door.

Click on the mannequin, and when it turns around, take it out of its breast pocket doctor's office key.

Follow the arrow down to the corridor. Approach the door on the right wall and use doctor's office key
to open it. Click on the door handle.
Come inside.
1. From the top drawer, take out dental forceps.
2. Complete the search for items, among which will be elevator handle. To get a green card - dental forceps open your jaw.

Go down the arrow to the corridor of the hospital and zoom in on the elevator doors right along the corridor.
Put back in place elevator handle and click on it. The elevator doors will open, go inside.
Take hand, and then click on the elevator handle that this arm was hanging from.

Exit the elevator when it goes down.
1. Shine flashlight on a clot of shadow, and when it disperses, take rune stone.
2. Zoom in on the pattern and move the cabinet doors to match the pattern on them with the pattern above the cabinets.
3. The lower cabinets will open - there is a Hidden Object Scene. Collect everything to get mount.


Follow the arrow down to the elevator, press the handle, and when you go up, enter the doctor's office through the right door.
1. Use hand to remove the snake, then zoom in on the broken terrarium again and grab key 1.
2. Use mount on the boarded up door.

Enter the doctor's office.
After talking with the ghost, a new task will appear - fix the projector.
Go to the undertaker's house.
screwdriver.

Go to the cemetery.
Complete a Hidden Object Scene to get record.

Go to the hospital entrance.
Zoom in on the gramophone and put it in record. When the ghost is gone, take the rest on the bench the cloth.

Enter the hospital and take the elevator down to the basement.
1. Zoom in on the mannequin.
2. Use screwdriver to unscrew the 4 screws.
3. When the first plate is removed, you will see 4 buttons on the second one. Press the buttons in the following sequence: bottom left - top right - top left - bottom right.
4. When the second plate is removed, on the third one you will see 4 colored sectors. You need to find the same color for all sectors. This color is green. Click on the sectors, exposing the green color everywhere.
5. On the last plate, you need to press the levers in the correct sequence. Required sequence: 1-4-3
.
Take away from clenched fingers scalpel.

Enter the elevator, go upstairs and enter the operating room.
Use scalpel on the poster to find behind it half heart.

Go to the cemetery.
Use torch on a clot of shadow until a magnifying glass sign appears. Zoom in on this place and put in the hands of statues half heart
. The clot of shadow will disappear, take tablet.

Go to the statue next to the police station.
Put back in place tablet and take the red from the hands of the statue gem
.

Go to the undertaker's house.
Examine the grave and use cleaver to clear the bushes and clear the cross. Insert into the center of the cross gem
. The cross-stash will open, take the green part of the puzzle.

Insert into the castle the green part of the puzzle
and solve the puzzle by clicking on the round pieces until a compartment opens (your goal is to move the colored element to a point opposite its starting position). Take key 2.

Get into the doctor's office.
1. Zoom in on the safe. Insert into round hole key 1 and key 2. When the safe opens, take projector.
2. Install projector on a tripod.
3. Hang on the wall the cloth.

Follow the down arrow to enter the doctor's office.
Complete a search for items that include fountain pen.

Get outside.
Zoom in on the frog fountain to the right of the entrance to the hospital. Put back in place fountain pen. When the water leaves - lift from the bottom tooth and the blue piece of the puzzle.
Go to the graveyard and zoom in on the ruined building behind the Spider Gate.
Insert into the castle the blue piece of the puzzle
and solve the puzzle by clicking on the round pieces until a compartment opens (your goal is to move the colored pieces to the dots opposite their starting position). Take clock detail.

Go to the hospital and take the elevator down to the basement.
1. Press the scissors, insert into them tooth and take yourself scissors.
2. Complete a Hidden Object Scene to get lever arm.
Take the elevator up into the corridor.
scissors cut the grate and take film.

Enter the doctor's office.
Install film into the projector.
After watching the movie, the ghost will disappear, and you will have a new task - find the cache. You can see his location on the screen.

Follow the arrow down to return to the doctor's office.
Click on the rug on the floor to remove it. Insert into the round hole lever arm and click on it. Get it out of the hiding place battery.
A new task will appear - revive the bear.
Enter the operating room and zoom in on the teddy bear on the gurney.
Put next to the teddy bear battery. The toy "comes to life" and gets out of itself clock detail 2.
A new task will appear - fix the undertaker's watch.
Go to the cemetery.
Use scissors to free the coffin from the chains. When the spirit from the coffin is released, a bunch of shadows will appear on the ground - shine on it flashlight and take rune stone.

Go to the undertaker's house.
Zoom in on the rune circle near the broken grandfather clock in the middle of the room.
Arrange in red circles 3 stones with runes. The lower compartment of the clock will open - zoom in on this location to activate a puzzle.
Insert missing spaces 2 clock parts.
By swapping and unfolding the tiles, assemble the snake pattern. Possible pressing sequence: 1-2-3-4-5-5-5-1
.

A grateful undertaker will leave for you spider gate key.
Go to the graveyard and zoom in on the Spider Gate. Use spider gate key
to open them.
Go through the open gate.
After talking with the witch, use torch to dispel all the clots of darkness and find 8 pairs of stones with the same runes.
Congratulations! You have completed the game "Secret Investigations. Ghost Town" ("The X-Files. Mystery of the Misty Lake").
If you have a collector's edition, then you can continue the bonus part of the game.
Interface:
The game is automatically saved in one save when moving to a new location or at key plot points.
Exit to the menu - the gear icon in the lower right corner of the screen.
When you receive a new task in the lower right corner of the screen, the question icon begins to vibrate. When you read a question, the game is paused, and to return to the game, you need to click on the question mark again.
Run - right mouse button.
Some items can be combined in the inventory by clicking one on the other.
If you use the item correctly, the upper left corner of the blue color lights up on its icon, if you use it incorrectly, yellow.
Spacebar - top view.
Scene I
We play as Rex.
Your first task is to find a hook. Click on the hook under the ceiling - high, you need to build a ladder. There is a statue in the center of the screen, move the washing machine towards it (in the left corner of the screen). Take the portrait (hidden behind the washing machine) and the piece of plastic cheese (in the lower right corner of the screen). Apply cheese on the washing machine first, and then the portrait. Click on the hook - Rex will climb the cheese onto the washing machine, and then there will be a crash.
Scene II.
We play as Socrotes.
You need to help out a friend, and for this you need to make an elevator.
To the left of Socrot, pick up the coil, and behind it - the bowl. Take the grains in the lower left corner of the screen and combine them with the bowl. Place the bowl in the dark hole in the upper left corner of the screen. A hamster will come running here, catch it and take it with you. Go right and put the hamster on the transporter. Tie the spool to the brown block next to the conveyor, take the end of the rope (to the right of the block) and tie it to the spool. Approach the wall with the instruments of torture and remove the two chains (the rightmost ones). Tie them in inventory and tie them to the transporter. Go to the cage and click on it. Sokrot will give the command to the hamster to touch with its paws and go down into the tunnel.
A map will appear in the upper left corner of the screen. You can play the mini-game "Maze" or click on the map and quickly move to the next location.
If you chose "Labyrinth", use the arrows to move.
Look for shovels to sometimes overcome heaps of earth and dig the road further (I found two), go down and up the stairs. Use the spacebar to see the plan of the maze from above. The exit from the maze is a bright red square.
When you get to the junkyard, immediately pick up the hook to the left of Socrot (it lies against the left wall under the fly agarics). Go right - there is a house in the dump, on the porch of which there is a sad mole. Water is gushing from five pipes above his head. There are taps on the pipes - try to twist one of them, and then talk to the mole. You should have a task - to eliminate leaks. When you're done, talk to the mole. His name is Alfredo and he saw Rex put in jail. You will receive a map of the city - use it to go to the prison.
Talk to the guards at the prison - the mayor personally deals with the prisoners in the prison, so he needs to apply for an audience. They will show on the map where the city hall is located. Go there.
Talk about an audience with the guard at the entrance. He will answer that inquiries can be made in window No. 5. On the right is a stall - obviously, this is window number 5. Talk to the mole woman named Lucinda. She will say that the application must be submitted at window No. 3. When you ask where window number 3 is, she will send you to the market. Nearby is a souvenir seller's stall - ask him for directions to the market, and a new location.
In the market, go past the sellers to the upper right corner of the screen - there is an exit. You will be taken to the left side of the screen, where Lucinda is already waiting for you. Talk to her - it turns out that this is window #2, but she will tell you where window #1 is located in exchange for beets. Return to the stalls and meet Bianca, who sells beets. She says that her beets are not for sale, but only bartered for other vegetables. Go back to window #2 and pick up the onion head (lying next to the fence). Give it to Bianca, take the beetroot and bring it to Lucinda. She will explain that window #1 is near the prison.
Go to the prison. From the entrance, go left and find the closed window in the hollow of the tree. Click on it - Lucinda is sitting inside. She will say that you first need to fill out the LADY form, which you need to take from window No. 5.
Go back to the city hall, get the LAD form from Lucinda in window #5 and go to the prison.
Give it to window #1 and finally you will find out that window #3 is near three mushrooms (i.e., in the junkyard).
A trailer appeared at the dump - this is window No. 3. Talk to Lucinda and find out that in addition to LOOKS, the audience requires four applications: a vaccination certificate, a revolutionary ID, three screws and a large piece of cheese.
Talk to Alfredo about the certificate - he will send you to the city hall to the souvenir seller Fernando.
Go to City Hall. Fernando will say that he threw the ID in the market down the drain.
Go to the left of his tray and pay attention to the car, near which two mole engineers are working. Pick up the bright red screwdriver on the ground under the spotlight of the car and unscrew the first screw from some faucet (to the right of the engineers). Ask what engineers do. It turns out that they serve the screw-cutting machine that breaks through the tunnels. The screw cutter can work independently if you hang a light signaling device, mark the place for the screw with a red cross and put a “Roadworks” sign next to it.
Go to the market and unscrew the second screw from the fence to the left of Bianca. Examine the sewer grate - you can't open it with your paws, you need a fishing rod. Talk to cheese seller Sergio - he wants 60 pesos for a large piece of cheese. Pick up a coin of 5 pesos to the left of Bianca's counter.
Money can be earned in three ways.
Talk to the third vendor named Ramon. He has an empty counter because the shipments of sweet potatoes are delayed. Agree to bring 10 sweet potatoes from the farm in exchange for 30 pesos. The entrance to the farm is next to the dump.
Go to the junkyard and go through the tunnel, next to which there is a road sign.
You can choose the shortcut or the Labyrinth.
Arriving at the farm, you will see Santiago sleeping in a chair. To his right is a bag, take it and go to the sweet potatoes. Sweet potatoes grow in multi-level caves with many passages. As soon as you try to enter any door, Santiago will wake up and forbid it. Introduce yourself to him, and the mole will allow you to collect 10 sweet potatoes. Walk through the caves and collect ripe sweet potatoes with two yellow dots on the side (there are exactly 10 of them). After that, approach Santiago and take the sweet potato whip (to his left).
Return to the market, give Ramon the sweet potatoes and get 30 pesos.
The second way to earn money is to talk to Alfredo at the dump, and he will offer garbage sorting.
Go to the left of his house and turn on the sorting machine. Three types of garbage will begin to crawl along the conveyor - paper, glass and metal. Use the mouse to control three trailers and substitute the correct trailer under the conveyor (each of them has an image of what kind of garbage it is intended for). This is a timed task, and the conveyor belt will begin to accelerate. Alfredo will pay 10 pesos for the first portion of garbage.
The third way to earn money is to talk to Fernando at City Hall. Tom needs revolutionary posters, for each of which he is ready to pay 5 pesos. There are posters on Alfredo's house, on the prison, on the fence in the market, on Santiago's house on the farm.
After earning 60 pesos, buy cheese from Sergio.
In inventory, combine the hook and yam whip to make a fishing rod. Fish the identity card of the revolutionary from the sewers.
Go to the prison and unscrew the third screw from the board where the worker sleeps (under the wall of the prison on the right). Talk to the guards about the vaccination, and one of them will offer to go behind the screen, where there is a flag with the image of a syringe hanging (to the left of the entrance).
Return to the landfill - and window number 3 is gone! Ask Alfredo - he will advise you to follow the tracks. The tracks lead to the Santiago farm. You will have to go through all the caves again to get to the location on the right, where there is a trailer. Give Lucinda all the applications and take the petition (the cheese will remain in your inventory).
Go to City Hall. Fernando will stop you and ask you to take a picture of the mayor. Unfortunately, the mayor will refuse to release Rex. Give the cheese, take a picture of it and pay attention to a large poster with a picture of some kind of monument.
Scene III.
After leaving the mayor, give Fernando the camera. He will offer to join the Resistance movement and help free Rex. Go to the junkyard to Alfredo's house. Pay attention to the toilet in the hallway and pull the rope hanging from the tank. A secret passage will open. To go down the stairs, turn on the light (hardly visible switch on the green wall above the railing). The second switch is located one floor down on the right side of the screen near the stairs. Go downstairs and click on the third switch near the leftmost door. Go one more floor down.
Alfredo and Fernando are waiting for you here. They will offer to study the portrait of the mayor under a magnifying glass. Take the magnifying glass and click it on the photos on the table. You will see a photo in which you need to find 6 active points: strange eyes, some kind of cut near the ear, cheese in the paw, cheese crumbs on the floor, the lower paw under the clothes and the rat's tail.
Talk to Alfredo - they had photographs of the mayor taken during the revolution, but they were thrown into the garbage chute. All residents of the city, including Sokrot, have been vaccinated, and they cannot leave the city, so Rex will have to go to the garbage chute. Photos are in a red box in the shape of a heart. The garbage chute is unlocked from Alfredo's house with the "insert the crocodile into the pudding" puzzle. Check the elevator - the door to the left of Alfredo (you need to activate it because you will need it later).
Climb up to the floor above and approach the door with three levers. The left lever changes the left eye of the crocodile, the middle one - the color of the pudding, the right one - the right eye. Pull the levers and make both eyes of the crocodile green and the pudding yellow.
Now you need to free Rex. To do this, you can use an automatic screw cutter. Go to the prison.
Pick up a shovel (the shovel from the tunnel is no good) and a stone near the sleeping worker. Automatically you will see that Alfredo and Fernando have been arrested and imprisoned. Throw a rock at the middle window of the first floor to find the cell where Rex is sitting.
Go to the market. Bianca put up a new sign over her counter. Ask where she got the red paint from. She will answer that she made the sign with a red aerosol, and threw the bottle with the remnants of the paint into a landfill.
Go to the landfill. Dig a road sign with a shovel, go to the left and pick up a bright red vial from a pile of garbage.
Go to City Hall. The engineers had already left, but the signaling device remained hanging on the rock. Unscrew it with a screwdriver and return to the prison.
Draw a red cross on the wall, place a traffic sign next to it and hang a signaling device on the wall. Talk to Rex again and tell him about the red box.
After the cutscene, Rex will end up in a junkyard and jump into a garbage chute.
Republishing - only with the consent of the author and the site.
The game is automatically saved in one save when moving to a new location or at key plot points.
Exit to the menu - the gear icon in the lower right corner of the screen.
When you receive a new task in the lower right corner of the screen, the question icon begins to vibrate. When you read a question, the game is paused, and to return to the game, you need to click on the question mark again.
Run - right mouse button.
Some items can be combined in the inventory by clicking one on the other.
If you use the item correctly, the upper left corner of the blue color lights up on its icon, if you use it incorrectly, it turns yellow.
Spacebar - top view.
Scene I
We play as Rex. Your first task is to find a hook. Click on the hook under the ceiling - high, you need to build a ladder. There is a statue in the center of the screen, move the washing machine towards it (in the left corner of the screen). Take the portrait (hidden behind the washing machine) and the piece of plastic cheese (in the lower right corner of the screen). Apply cheese on the washing machine first, and then the portrait. Click on the hook - Rex will climb the cheese onto the washing machine, and then there will be a crash.
Scene II
We play as Socrotes. You need to help out a friend, and for this you need to make an elevator. To the left of Socrot, pick up the coil, and behind it - the bowl. Take the grains in the lower left corner of the screen and combine them with a bowl. Place the bowl in the dark hole in the upper left corner of the screen. A hamster will come running here, catch it and take it with you. Go right and put the hamster on the transporter. Tie the spool to the brown block next to the conveyor, take the end of the rope (to the right of the block) and tie it to the spool. Approach the wall with the instruments of torture and remove the two chains (the rightmost ones). Tie them in inventory and tie them to the transporter. Go to the cage and click on it. Sokrot will give the command to the hamster to touch with its paws and go down into the tunnel.
A map will appear in the upper left corner of the screen. You can play the "Labyrinth" mini-game or click on the map and quickly move to the next location. If you chose "Labyrinth", use the arrows to move around. Look for shovels to sometimes overcome heaps of earth and dig the road further (I found two), go down and up the stairs. Use the spacebar to see the plan of the maze from above. The exit from the maze is a bright red square.
When you get to the junkyard, immediately pick up the hook to the left of Socrot (it lies against the left wall under the fly agarics). Go right - there is a house in the dump, on the porch of which there is a sad mole. Water is gushing from five pipes above his head. There are taps on the pipes - try to twist one of them, and then talk to the mole. You should have a task - to eliminate leaks. When you're done, talk to the mole. His name is Alfredo and he saw Rex put in jail. You will receive a map of the city - use it to go to the prison.
Talk to the guards at the prison - the mayor personally deals with the prisoners in the prison, so he needs to apply for an audience. They will show on the map where the city hall is located. Go there.
Talk about an audience with the guard at the entrance. He will answer that inquiries can be made in window No. 5. On the right is a stall - obviously, this is window number 5. Talk to the mole woman named Lucinda. She will say that the application must be submitted at window No. 3. When you ask where window number 3 is, she will send you to the market. Nearby is a souvenir seller's stall - ask him for directions to the market, and a new location will appear on your map.
In the market, go past the sellers to the upper right corner of the screen - there is an exit. You will be taken to the left side of the screen, where Lucinda is already waiting for you. Talk to her - it turns out to be window #2, but she will tell you where window #1 is in exchange for beets. Return to the stalls and meet Bianca, who sells beets. She says that her beets are not sold, but only bartered for other vegetables. Go back to window #2 and pick up the onion head (lying next to the fence). Give it to Bianca, take the beetroot and bring it to Lucinda. She will explain that window #1 is near the prison.
Go to the prison. From the entrance, go left and find the closed window in the hollow of the tree. Click on it - Lucinda is sitting inside. She will say that you first need to fill out the LADY form, which you need to take from window No. 5.
Go back to the city hall, get the LAD form from Lucinda in window #5 and go to the prison.
Give the LADY form to window #1 and finally you will find out that window #3 is near three mushrooms (i.e., in a junkyard).
A trailer appeared at the dump - this is window No. 3. Talk to Lucinda and find out that in addition to the LAD form, four applications are required for an audience: a vaccination certificate, a revolutionary ID, three screws and a large piece of cheese.
Talk to Alfredo about the certificate - he will send you to the city hall to the souvenir seller Fernando.
Go to City Hall. Fernando will say that he threw the ID in the market down the drain.
Go to the left of his tray and pay attention to the car, near which two mole engineers are working. Pick up from the ground a bright red screwdriver lying under the spotlight of the car, and unscrew the first screw from some tap (to the right of the engineers). Ask what engineers do. It turns out that they serve the screw-cutting machine that breaks through the tunnels. The screw cutter can work independently if you hang up a light signaling device, mark the place for the screw with a red cross and put a "Roadworks" sign next to it.
Go to the market and unscrew the second screw from the fence to the left of Bianca. Examine the sewer grate - you can't open it with your paws, you need a fishing rod. Talk to cheese seller Sergio - he wants 60 pesos for a large piece of cheese. Pick up a coin of 5 pesos to the left of Bianca's counter.
Money can be earned in three ways. Here is the first one. Talk to the third vendor named Ramon. He has an empty counter because the shipments of sweet potatoes are delayed. Agree to bring 10 sweet potatoes from the farm in exchange for 30 pesos. The entrance to the farm is next to the dump. Go to the junkyard and go through the tunnel, next to which there is a road sign. You can choose a short path or "Labyrinth". Arriving at the farm, you will see Santiago sleeping in a chair. To his right is a bag, take it and go to the sweet potatoes. Sweet potatoes grow in multi-level caves with many passages. As soon as you try to enter any door, Santiago will wake up and forbid it. Introduce yourself to him, and the mole will allow you to collect 10 sweet potatoes. Walk through the caves and collect ripe sweet potatoes with two yellow dots on the side (there are exactly 10 of them). After that, approach Santiago and take the sweet potato whip (to his left). Return to the market, give Ramon the sweet potatoes and get 30 pesos.
The second way to earn money is to talk to Alfredo at the dump, and he will offer garbage sorting. Go to the left of his house and turn on the sorting machine. Three types of garbage will begin to crawl along the conveyor: paper, glass and metal. Use the mouse to control three trailers and substitute the correct trailer under the conveyor (each of them has an image of what kind of garbage it is intended for). This is a timed task and the conveyor belt will speed up over time. Alfredo will pay 10 pesos for the first portion of garbage.
The third way to earn money is to talk to Fernando at City Hall. Tom needs revolutionary posters, for each of which he is ready to pay 5 pesos. There are posters on Alfredo's house, on the prison, on the fence in the market, on Santiago's house on the farm.
After earning 60 pesos, buy cheese from Sergio.
In inventory, combine the hook and yam whip to make a fishing rod. Fish the identity card of the revolutionary from the sewers.
Go to the prison and unscrew the third screw from the board where the worker sleeps (under the wall of the prison on the right). Talk to the guards about the vaccination, and one of them will offer to go behind the screen, where there is a flag with the image of a syringe hanging (to the left of the entrance).
Return to the landfill - and window number 3 is gone! Ask Alfredo - he will advise you to follow the tracks. The tracks lead to the Santiago farm. You will have to go through all the caves again to get to the location on the right, where there is a trailer. Give Lucinda all the applications and take the petition (the cheese will remain in your inventory).
Go to City Hall. Fernando will stop you and ask you to take a picture of the mayor. Unfortunately, the mayor will refuse to release Rex. Give the cheese, take a picture of it and pay attention to a large poster with a picture of some kind of monument.
Scene III
After leaving the mayor, give Fernando the camera. He will offer to join the Resistance movement and help free Rex. Go to the junkyard to Alfredo's house. Pay attention to the toilet in the hallway and pull the rope hanging from the tank. A secret passage will open. To go down the stairs, turn on the light (hardly visible switch on the green wall above the railing). The second switch is located one floor down on the right side of the screen near the stairs. Go downstairs and click on the third switch near the leftmost door. Go down one more floor.
Alfredo and Fernando are waiting for you here. They will offer to study the portrait of the mayor under a magnifying glass. Take the magnifying glass and click it on the photos on the table. You will see a photo in which you need to find 6 active points: strange eyes, some kind of cut near the ear, cheese in the paw, cheese crumbs on the floor, the lower paw under the clothes and the rat's tail. Talk to Alfredo - they had photographs of the mayor taken during the revolution, but they were thrown into the garbage chute. All residents of the city, including Sokrot, have been vaccinated, and they cannot leave the city, so Rex will have to go to the garbage chute. Photos are in a red box in the shape of a heart. The garbage chute is unlocked from Alfredo's house with the "Put the crocodile in the pudding" puzzle. Check the elevator - the door to the left of Alfredo (you need to activate it because you will need it later). Climb up to the floor above and approach the door with three levers. The left lever changes the left eye of the crocodile, the middle one - the color of the pudding, the right one - the right eye. Pull the levers and make both eyes of the crocodile green and the pudding yellow.
Now you need to free Rex. To do this, you can use an automatic screw cutter.
Go to the prison. Pick up a shovel (the shovel from the tunnel is no good) and a stone near the sleeping worker. Automatically you will see that Alfredo and Fernando have been arrested and imprisoned. Throw a rock at the middle window of the first floor to find the cell where Rex is sitting.
Go to the market. Bianca put up a new sign over her counter. Ask where she got the red paint from. She will answer that she made the sign with a red aerosol, and threw the bottle with the remnants of the paint into a landfill.
Go to the landfill. Dig a road sign with a shovel, go to the left and pick up a bright red vial from a pile of garbage.
Go to City Hall. The engineers had already left, but the signaling device remained hanging on the rock. Unscrew it with a screwdriver and return to the prison.
Draw a red cross on the wall, place a traffic sign next to it and hang a signaling device on the wall. Talk to Rex again and tell him about the red box. After the cutscene, Rex will end up in a junkyard and jump into a garbage chute.
Scene IV
We play as Rex. You can choose the shortcut or the "Labyrinth". One way or another, Rex will be in the village and meet Ingel. He will tell you that Princess Lucrezia lives here. Go right and introduce yourself to the princess. She will want to make sure that you are not a spy, and will ask you to get the heart of the puffball mushroom. To the left of it grows a green mushroom with three holes. To get the heart, you need to plug two of the three holes with something. For this, two coconuts are suitable, which lie by the fence to the left and right of the princess. Plug the holes, put your paw in the mushroom and give the heart to the princess. She will believe in the sincerity of your intentions and send you to consult with the chef Manuel. Go right. The cook is forced to defend the village from the terrible and gluttonous Reptile so that it does not swallow the locals. Manuel fed the red box with the heart to the Reptile. There is nothing to do - you have to get her to eat Rex too. But you need some kind of armor, because the snake has very large teeth, and Rex can die if he climbs inside just like that. A rooster-inventor comes to the rescue. He sends Rex out for a walk until he comes up with something. Exit the gate and go back - the rooster has already drawn the Trojan elephant, which you will have to make from improvised materials.
Go to the location to Ingel and pick up a washing machine, 2 circles for the toilet, 2 skis, a basin and a barrel from the garbage heap. At the location with the princess, pick up the green barrel from the fence on the left of the screen. At the location with Manuel, take the barrel near the gate (on the left of the screen), and near the cook - a purple barrel, 2 bowls, a broom, a pipe. Place 4 barrels on the cross near Manuel, on them - a washing machine, then a basin, a pipe, 2 bowls, 2 skis and a broom. The Rex will jump in on its own and the Reptilian will immediately swallow it.
Rex will be in the esophagus. Here you have to move exclusively by running (right mouse button). After a certain time, gases will escape from the esophagus and blow Rex to starting position. Therefore, you need to grab onto certain pimples at the bottom of the esophagus, wait out the attack and run to the next pimple. Some bumps will burst under Rex's paws. You need to grab the 4th pimple on the left, wait out the attack, then run to the 8th pimple on the left, wait out the attack and quickly run to the right.

You will find yourself in the stomach, and the duodenum with processes blocks the further path. Each process is pumped with a curl of a certain shape. Pick up green semi-digested objects in the stomach and insert them into the coils of the intestine. If everything is correct, it will open and you will fall into the next cavity. Four bubbles hang here, and acid drips from the ceiling above them. You must click on the bubbles in a certain order to open the way further. It is impossible to allow Rex to get his paw into a puddle of acid, into splashes from a drop at the bottom of the cavity, and it is also impossible for a drop to fall on Rex from above - he will return to his original position. Therefore, jump over the pools of acid and click on the bubbles in this order (from left to right): 4, 1, 3, 2. In the next cavity, you will find a brass band of four instruments that play out of order. The puzzle is randomly generated - you need to make sure that all the instruments play the march at the same time. Pick up a feather and, by pressing it on the instruments, improvise. When, at last, Rex bows, go to the right and take away the red box. To the right is the exit.
After talking with Manuel, return to Lucrezia and show her the red box. She will allow you to take your staff (crimson, stands next to her throne). Return to Ingel, pick up one of the crimson balloons growing on a tree and return to the landfill.
Scene V
We play as Socrotes. After picking up the box, go to the basement to Alfredo. There is a policeman on the stairs, so use the elevator. Unfortunately, in secret laboratory The cops have already come and smashed it. You need to find a light bulb and a magnifying glass lens.
Walk up one floor. Turn on the light with the right switch (otherwise Sokrot won't go through the darkness) and go to the stairs. Turn off the light and unscrew the bulb. Return to the basement and screw it into the table lamp. There is a projector in the foreground of the screen, remove the lens from it and insert it into the magnifying glass. Use a magnifying glass on the photo - there should be four of them.
The first photo shows two people dragging a carpet. It is necessary to mark 6 points: someone's paws from the toilet, a heart on the toilet, a carpet, a rat's paw on the carpet, a mole photographer's baseball cap, a camera.
The second photo is at City Hall. It is necessary to note 5 points: a poster, a rat tail of the mayor, a king, a carpet, a crown on the head of the king.
The third photo is a demonstration. 4 points should be noted: on the left - a mole-photographer, Sergio standing next to him, a revolutionary on the far left with a lightning bolt on his face, a revolutionary in the third row with cheese in his paw.
The fourth photo is near the city hall. It is necessary to note 5 points: the mayor's suit, under it - a rat's paw, a sculpture's paw, a dark passage behind the sculpture, the city hall wall.
Go to the market to Sergio. He will say that the mole-photographer's name is Javier, and mark his house on the map.
Go to Javier. He works as an installer and installs the light for the mayor's coronation. After talking with him, you will receive the key to the safe where the photo lies. Ask Javier about the carpet and bungee rope.
Open the safe and arrange the toys like this (these are simple tags):
top row: ball, blue plane, red plane;
middle row: doll, empty space, windmill;
bottom row: gray bear, horse, red bear.

Take the photo and go to Alfredo's house. Click on the table with a magnifying glass and find 4 active points: a heart on the toilet, a king in a carpet, a mole's nose that is facing you, in the background - some kind of glass cylinders.
Return to the market and ask the sellers about these cylinders - a new location will appear on the map. Go there. Socrates will see his magnet, which he once lost. You can’t just take it like that, since the magnet is behind the glass. Nearby is a mole with a lawn mower. Go right to the glass cylinder control mechanism and lift the lever up. Check the location of the magnet - it got into the first cylinder, because it was attracted through the glass to the lawn mower. Talk to the mole - he refuses to go to the right so that you can get the magnet. Go to the left and pick up a bag of fast-growing grass. Place grass next to the cylinder control mechanism. Lower the lever, spin the wheel and raise the lever again - the grass will instantly grow, and the mole will mow it. As a result, the magnet will be pushed out of the cylinders, and you can pick it up.
Now you need to take up the monument, which stands on the right. Try to press it - the paws of the revolutionaries are moving. You saw the monument on the poster in the City Hall. Go to City Hall.
Go to the left of the front door and pull the sculpture by the paw. Enter the mayor's office and carefully examine the poster. You need to memorize the location of 8 items held by the revolutionaries.
Go to the monument and, moving the paws of the revolutionary moles, put them in the same position as on the poster: you need to move the trowel 2 times, the fishing rod - 2 times, the guitar - 2 times, the sword - 2 times, the hammer - 2 times, the roll - 1 time.

Socrates will conclude that there is a secret hideout of rats and a deposed king.
Go to the prison and click on the far right window of the 2nd floor. Talk to Fernando and Alfredo. Read the leaflet (they hang all over the city) about the upcoming coronation of the mayor.
Go to the dump and give the task to Rex to free the king. After that, go to Javier and tie the magnet to the bungee rope.
Scene VI
We play as Rex. Again, you have a choice - to go on the map a short way or through the "Labyrinth". You will find yourself in a 5-story tower, where the king is locked in a cage at the very top. The cage must be lowered to the level of the 2nd floor, where there is a hole in the glass cylinder. To move the cell down, you must first turn the lever on the gateway between floors, and then turn the wheel on the 4th floor. Only one lever can be turned at a time. The matter is complicated by the fact that a guard constantly walks the floors, and if he catches Rex, he will have to start all over again. The floors can be walked through pipes. If you see red eyes in the pipe, then the guard will now exit through this pipe. You need to hide from the guard behind the barrels. The security guard does not enter the 1st floor.
To save the king, you need to collect 4 items from the floors: on the 4th floor, tear off the plaster from the right pipe, on the 5th floor, pick up the valve (on the right), on the 3rd floor - a leaky inflatable duck (on the right) and scissors (on the left). In inventory, seal the duck and go down to the 1st floor. Through the middle pipe, go to the right side of the central cylinder and inflate the duck with gas from the cylinder. Drain the water from the central cylinder by turning the valve. Now you need to lower the cage from the 5th floor to the 2nd, successively pressing the levers and not forgetting to turn the wheel. When the king is on the 2nd floor, you need to enter the 2nd floor through the left pipe and cut the rope on which the cage hangs with scissors (you need to use scissors on the king). The king will fall to the bottom of the cylinder, throw a duck into the hole. Climb to the 5th floor and go down the right pipe to the 2nd floor on the right side of the central cylinder. Hang a valve on the pipe and pour water again. Go back to the 2nd floor on the left side and talk to the king. It remains to watch the final video.
Related publications
-
 Game optimization and FPS boost
Each game has a certain level of graphics and optimization. And to find the line between these indicators, you need to carefully analyze everything ...
-
Checking the integrity of the game cache on Steam
Steam has a cache check feature that allows you to restore corrupted files without reinstalling the game. This operation is...