
Formulas how to add a cube. How to Solve a Rubik's Cube and Save Your Nervous System

You've been scratching your head over this puzzle for a week. And now, finally, it is assembled! .. You will never understand the joy of a person who has collected a Rubik's cube until you try to do it yourself.
For an inexperienced layman, collecting a Rubik's cube is not an easy task. Of course, on the Internet you can find both videos and instructions with where there is detailed description step by step assembly. But not all methods lend themselves to successful application in practice.
For beginner builders
Let's figure out what the 3x3 Rubik's Cube consists of and how it can be twisted (although, most likely, it will twist you at first!).
The cube has a frame - a cross, on which the central details of each side are fixed. These details are motionless, and the rest of the "brotherhood" revolves around them.
Now take the cube, turn one of the sides towards you (at your discretion) and carefully consider:

B - top side
H ─ bottom side,
L ─ left side,
P ─ right side,
Ф - frontal (front) side,
Z ─ back side.
And, accordingly, it is important to learn combinations of turns:
F, Z, V, N, L, P - rotation clockwise (or away from you) by 90 degrees;
Ф ', З ', V ', N ', L ', P ' - counterclockwise rotation (or - towards yourself) by 90 degrees;
F”, Z”, V”, N”, L ″, P ”- rotation by 180 degrees.
The simplest scheme for assembling a 3x3 Rubik's Cube consists of seven consecutive steps.
Step 1. Assemble the cross on the top face.
Choose the side that will be the top. We will collect the "correct" cross. This means that on the top side, the center will be surrounded by details of the same color, and on the side faces, the stickers on the top cube and the central one will be different, but also the same color.
To get this result, the easiest way is to use one of the above rotations to move the cube of interest to us down, combine it with the center of the same color and move it back up.
When you have collected several edges in this way, and the next one is so that, by lowering it, you will break the top, the combination P ', N ', P comes to your aid, allowing you to return everything to its place.
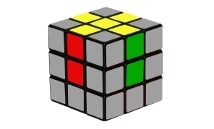
Step 2. Arrange the corners of the upper face.
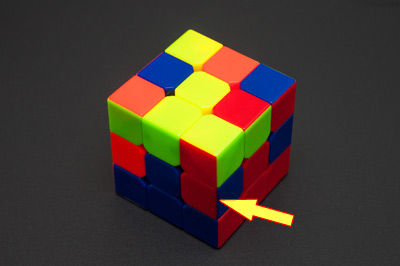
It is easiest to start from those corners that are at the bottom. We twist the bottom so that the desired angle becomes under the place assigned to it, as in the picture below. Then we move it up with one of the turns, most likely breaking the upper cross, so we fix the angle by turning it completely in the opposite direction, put the center in place and return the corner. For example, for the case shown in Figure 4, we use a combination of P, F ', P ', F.
The principle is based on the fact that we “knock out” others with some cubes. If the corner is on top, then it is better to move it down, for example, by turning П′, and then put it in its place
Expected Result:
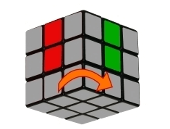
Step 3. We collect the middle layer.
First, turn the cube so that the assembled side is at the bottom. Now you can arrange the four edges of the middle layer in their places. Three combinations are possible here:
1. It is necessary to transfer the cube from the top right to the front face. We turn B ', F ', B, F, B, P, B ', P '.
2. You can move to the right using a combination of B, P, B ', P ', B ', F ', B, F.
3. To turn an edge that is in the right place, but on the wrong side: П, В', П', В', Ф', В, Ф, В', П, В', П', В', F', V, F.

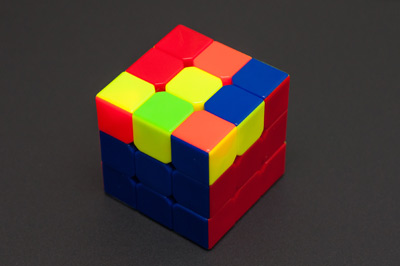
Result:
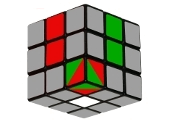
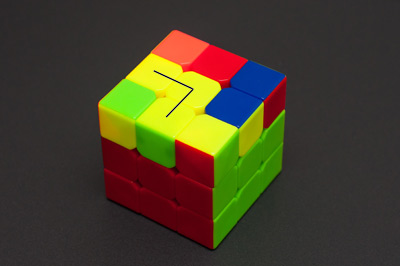
Step 4. We collect the "wrong" cross on the "new" top face.
The goal is to reach the variant with fig. 10, assemble the "white cross":
1) a combination of F, P, V, P ', V ', F ";
2) F, V, P, V’, P’, F’;
3) any of the proposed combinations twice.
Step 5. We make the “correct” cross out of the “wrong” one.
Rotate the top layer until any two edges match in color with the centers from the middle layer. There are two cases here:
1. In their places - two opposite edges, the other two need to be swapped. We use a combination of P, V, P ', V, P, V ”, P '.
2. The two assembled edges are at an angle, the other two need to be swapped with a combination of P, B ”, P ', B ', P, B ', P '. You may need to repeat this combination several times.
Result:
Step 6. Put the corners of the top layer in place.
To carry out this step, use one of the suggested combinations:
1) P’, F’, L, F, P, F’, L’, F;
2) F’, L, F, P’, F’, L’, F, P.
Step 7. Expand the corners with the right colors.
We hold the cube towards us with one side so that the “wrong” angle is on the top right. With a combination of P ', N ', P, N, we twist the cube until the corner is right. Next, scroll the top to the next wrong turned corner and set it correctly with the same combination. We do not change the working side!
During these actions, the design of the cube may be broken. But that's how it's written in the script. So don't worry!
Finally, you can turn all four corners to the correct sides - the rest of the elements of the cube also fall into place! Be proud of yourself - you did it! Congratulations on a successful result!
Photo: kak-sobrat-kubik-rubika.praya.ru, speedcubing.com.ua, ru.gde-fon.com.
Pardon in the text? You saw її, push Shift+Enter or click.
Hello. If you decide to learn how to solve a 3x3 Rubik's Cube, then at one of the assembly stages it will be very difficult for you to do without formulas. Reading the formulas for assembling a 3x3 cube is not at all difficult. Below you have collected all the symbols with which you can read the formulas for assembling a cube.
The language of rotation of the sides of the cube 3x3
Since the Rubik's cube has 6 sides, we will have 6 main symbols.
F - front - front side
B - back - back side
L - left - left side
R - right - right side
U - up - top side
D - down - bottom side
If there is nothing after the letter, then we turn this side clockwise once, as if we were looking at the face in the face.
If there is a stroke after the letter ‘(stroke), then you need to twist it once counterclockwise, as if we were looking at the face in the face.
If there is a deuce 2 after the letter, then the indicated side must be twisted 2 times (180 degrees).
Rotation of the main sides of the 3x3 cube with symbols in pictures (for clarity)


In addition to the basic values, there are also others, you need to study them if you want to study complex formulas for speedcubers.
Letter+w:
fw– frontal together with the middle layer
bw– back together with the middle layer
lw– left side with middle layer
Rw– right together with the middle layer
Uw– top together with the middle layer
Dw– lower together with the middle layer
Fw '- frontal together with the middle layer counterclockwise
Bw' - back together with the middle layer counterclockwise
Lw' - left together with the middle layer counterclockwise
Rw '- right together with the middle layer counterclockwise
Uw' - top together with the middle layer counterclockwise
Dw '- lower together with the middle layer counterclockwise
Fw2 - frontal with a middle layer 180 degrees
Bw2 - back together with the middle layer 180 degrees
Lw2 - left with the middle layer 180 degrees
Rw2 - right together with the middle layer 180 degrees
Uw2 - top with middle layer 180 degrees
Dw2 - bottom with middle layer 180 degrees
Note: Previously, such movements in the 3x3x3 cube were indicated by small letters (r, l, b, etc.). However, some time ago, due to confusion with the language of rotations of large cubes (there, small letters denote rotations of only the inner layers), the world association of the cube switched to the designations Rw, Lw, etc. Therefore, now it is correct to designate the motions of some outer face together with the inner index w adjacent to it. Small letters remained only for the 4x4x4 cube and denote rotations of only one inner layer adjacent to the outer one.
Rotations of the middle layers
M – middle layer located between the left and right layers

S- the middle layer between the front and back layers

E- the middle layer between the top and bottom layers

For more than 40 years, the Rubik's Cube has sold 350 million copies around the planet and has become one of the most popular toys of the 20th century. In 1980, every fifth inhabitant of the Earth tried to assemble it, and in the 2000s, robots and computer systems were connected to solve the puzzle. Today there are more than 30 types of cubes.
They differ in intricate shapes and levels of complexity. The classic Rubik's Cube is 3x3. With his help, Erno Rubik, a teacher at the Hungarian Academy of Applied Arts and Crafts, hoped to intelligibly explain to students the mathematical theory of groups and the advantages of spatial thinking.
It is with this puzzle that beginners are recommended to begin their acquaintance with the Rubiks family.
How the classic Rubik's Cube works
The original toy with a 3x3 configuration consists of 26 cubes, which are divided into central and edge.In the very heart of the cube, in place of the "invisible" cube, there is a cylindrical fastening mechanism. It is connected to all external elements and is responsible for ensuring that they rotate freely relative to each other.
But there is one subtlety: the mechanism is connected directly only to the central parts. Side and corner cubes are held behind them (and each other) with the help of special protrusions. The design of the model is designed so that only faces can be moved. But there are no restrictions on the coordinate axes.
Rubik's Cube and God's Number
The multi-colored puzzle just seems like easy fun. It took the professor a month to develop the assembly algorithm of his own invention. According to combinatorics, the possible states of the Rubik's Cube are 43,252,003,274,489,856,000. Translated into human language, this figure sounds like 43 quintillion. Surprisingly, this is not the limit: the value will double if you take into account the difference in the location of the central elements.
It would take a professional speedcuber 4200 trillion years to go through all the combinations. The unattainability of the goal does not prevent fans from looking for the easiest and fastest way to build. The new world record was set last fall by 15-year-old Patrick Pons from the USA. The teenager solved the problem in 4.69 seconds and 17 rotations.
The minimum number of steps included in the algorithm for assembling a classic cube from any position is 20. It is called the “number of god”. Not everyone can play by such strict rules. On average, an experienced speedcuber makes 40 to 50 moves.
Assembly formula for beginners
 The 3x3 puzzle follows the general principle. Much depends on its condition at the time of assembly. To better understand the structure of the cube, you can disassemble it into parts, and then reassemble it. In this case, it is important to correctly place the edges.
Instructions for assembling the classic Rubik's cube consists of seven points:
- Creating a cross on the top plane
- Working with the corners next to it
- Collection of middle ribs
- Creating a cross from below
- Working with the bottom ribs
- Fitting the bottom corners
- final turn
Before you begin to study the algorithm for assembling the Rubik's Cube game, you need to find out the history of its occurrence. The cube was invented by the Hungarian professor and sculptor Erno Rubik in order to explain the basics of mathematics to his students.
However, the mathematics of the Rubik's Cube soon struck the minds of others, including Tibor Lakzi, who was busy promoting the game. By the end of the 20th century, assembling the Rubik's Cube had become a new hobby for many, and the circulation of the game exceeded one hundred million copies. The world record was set by Mats Volk. He solves the best Rubik's cube in 5.55 seconds.

How to disassemble a Rubik's Cube if it is already assembled and why is it needed? The structure should be disassembled in order to make sure that all the parts are arranged correctly. To do this, you need to mechanically arrange the parts in their places and only then proceed to the initial stage.
What are Rubik's Cubes? It should be said that the varieties of the Rubik's Cube range from 2x2 to 7x7 inclusive.
The types of Rubik's cube are also diverse. For example, there is a very original Rubik's cube - in the form of a 3-d pyramid, munks, a mirror Rubik's cube. However, the 3x3 Rubik's Cube puzzle is most often used.
Before you learn how to assemble a disassembled game, it's worth learning a little theory for beginners. For starters, this is a Rubik's Cube device. The whole cube consists of 6 edges and 12 faces, as well as mounts that hold all parts of the structure.
There are three positions of minor elements:
- Central. There are only 6 such positions, the element is located in the center of the face. One side item belongs to 1 part.

- Lateral. Such elements form a cross of 4 pieces on one face. One side position belongs to 2 elements.
- Corner. located at the corners of the structure. There are 3 cubes per corner.
It is also necessary to learn the language in which any formula for solving a Rubik's cube is written. Rubik's cube diagram notation.

After the basic notation has been studied, you can proceed to the assembly of the structure itself.
How to solve a Rubik's cube 3x3 - quickly and easily. The best technique for beginners.
Steps to assemble a Rubik's Cube

There is a simple instruction that proves best of all that even a child can fold an ordinary figure, as well as a mirrored Rubik's cube. How to solve a Rubik's cube 3x3 scheme for children - the Friedrich method.
First stage. Assembling a Rubik's Cube always starts with a cross. Assembling an ordinary cross on one of the faces is quite simple, you just have to decide on the color: yellow is most often used. At this stage, you can ignore the position of the colors on the other sides.

Second phase. The most important thing is to learn how to assemble the right cross. This means that the top elements of the mating sides must have the same color as the central ones of the same faces. If this did not happen, that is, a maximum of two sides did not match, one of the following algorithms should be used.
In this case, an important criterion is that the cross is always at the top.
Third stage. It is necessary to fully assemble one of the sides, that is, put the corners in place. If you turn the cross over and make it the bottom side, you will notice that the upper corners of the adjacent sides contain the one you chose as the basis. Accordingly, there are three options for the position of the yellow element: top, left or right, and for each of them there are their own combinations to combine them with the bottom side.

In the end, it should turn out that one side is completely ready, and the top layer of each adjacent side and the center have the same color.

Fourth stage. Before you start collecting a cube for speed, you should remember some more formulas.
First you need to turn the finished side up again. Then scroll the bottom edge so that one of the colors of the side element matches the color of any side and forms the letter “T”. Thus, you will need to move the side cube from the bottom layer to the middle one so that its two colors match the colors of the adjacent sides. In this case, there may be two positions.

Fifth stage. Now we need to deal with the 3rd layer. First you need to turn the cube so that the “raw” side is on top. If you chose yellow as the main color, then white should be the diametrically located color. You need to apply the following algorithm for a certain position of the cube(s) with white color.
Sixth stage. Assembling a regular cross, in which the colors of the upper face must match with adjacent ones, implies two cases, but if none of the cases is suitable, any algorithm can be used.

Seventh stage. Arranging the corners in your position at this stage will be quite difficult. There can be confusion between the layers here, but with proper assembly, everything will easily fall into place.
Eighth stage. To turn the corners correctly, we need to consider two cases, again related to moving in a circle.
If you need to change the corners crosswise or opposite corners, you can use any of the algorithms.
The same method can be used to assemble a mirrored Rubik's cube. A small Rubik's cube will be much easier to solve, but the Rubik's cube will only count as a record for the 3x3 variant.
Secret Technology

If your goal is to complete a Rubik's Cube in a minute or less, and become the best at it, you need to know some assembly secrets.
- It is best to start the assembly by choosing white or yellow as the base.
- The correct Rubik's cube technique means that you need to spend as little time as possible turning the cube over. Even if you do it quickly, there will be a difference in precious seconds or milliseconds, which can change the world record. Therefore, many begin the assembly of the initial cross on the bottom face.
- A good result is always shown by the one who knows how to look one step ahead - at stages where strong mental stress is not required, one must already think over the next move.
- Speed Rubik's Cube 3x3 is different high quality and the ability to rotate, however, for this you can use a special lubricant, even for not very expensive designs.
- A professional Rubik's Cube implies the ability to use all fingers when solving, and this often helps to set a new world record.
How to assemble with closed eyes according to the algorithm

How to solve a rubik's cube eyes closed? Just remember a few rules.
- Pictures of the Rubik's Cube should always be in memory as before your eyes. To do this, you need to start the assembly each time with the same color and remember that the centers of the sides are always stationary relative to each other.
- The invented method of assembling with closed eyes is the best way to quickly start hitting others. The algorithm assumes that you first need to correctly orient the corner elements using the formula “R W R’ W R W2 R’ L’ W’ L W’ L’W2 L”, since each corner contains either white or yellow.
- Then you need to do the orientation of the side elements. We need to determine if the element is in the correct orientation. If it is correct, then the color of the element matches the color of sides B and H and does not match the other sides. If the element belongs to the middle layer, then the orientation is correct if the color of the element of the same sides has the F or Z sides.
Thus, by repeating these algorithms, it is possible to arrive at the initial position of all elements. In the same way, you can learn how to collect another unusual look - a mirrored Rubik's cube.
How to solve the Rubik's Cube the easiest instruction
So, you got acquainted with the Rubik's Cube 3x3x3 puzzle and you liked it. But how to learn how to collect a cube, and even better how to collect it faster, you don’t know yet. Especially for you, novice puzzle lovers, I am making this instruction, which will not only help you learn how to solve the Rubik's Cube, but also do it faster than 1 minute (in the future, we plan to create instructions for those who want to solve the cube faster than 30 seconds).
Let's start with the fact that here you can, this is especially true for those who want to collect the cube quickly, and the old cube does not allow this for technical reasons =)..

The most common 3x3x3 cube assembly technique is Jessica Friedrich's technique. This technique breaks the assembly of the Rubik's Cube into 4 stages. And at the initial assembly level (at a speed of up to 1 minute), you need to learn not so many formulas. I will try to make instructions that will be understandable and will contain all the necessary information.
First, briefly about the assembly steps.
Steps to assemble a Rubik's Cube

1. We collect the cross. The task of this stage is to place 4 cubes in their places around the white center (many people use white as the main color when assembling, you can use any).
2. In the method of Jessica Friedrich, at the second stage, the first 2 layers are immediately collected ( F2L – first two layers). But for a beginner puzzle builder, this will be quite difficult, so we will look at how to do this step in 2 steps, simplifying the task a bit.

3. Assembly of the yellow side of the cube ( OLL-orientation of the Last layer). At this stage, we collect the yellow side of the cube. The assembly of this stage, even by advanced speedcubers, is not always performed using a single formula. We will look at how to assemble the yellow side in a few steps.

4. The last stage of the cube assembly is called Permutation of the Last Layer (PLL). At this stage, it is necessary to place the corner and edge cubes correctly in the last third layer of the puzzle.
Now let's move from theory to practice.
So, let's start assembling the cube. For the convenience of learning, please remember that the cube must be kept with the white center down and the yellow up!
The assembly of the die begins with a cross on the main side, usually white. In this manual, white will be the main. This stage is carried out completely intuitively, there are no formulas, but there are typical situations that should be remembered to speed up the assembly.
Important! Collecting is not just a white cross on the white side. Each edge cube has two colors, and it must match two centers, white and one of the other four colors (you can see in the photo how the orange-white and green-white edges match the orange and green centers).
1. Check the side with the white center for white edges. If they are, then simply by rotating the bottom layer of the cube, you can match this edge with the second center. See how to do it in the video below. Let me remind you that you need to collect the cube with the white center down!
2. If you have already completed the first step of this step, turn your eyes to the top of the die (the side with the yellow center). If there are white rib cubes near the yellow center, then it is easy enough to install them in the right place on the main side (with a white center). To do this, rotate only the top layer to match this edge with the second center (orange, red, green or blue), while turning the side on which the center and the edge coincided to face you. After the edge coincides with the additional center, you need to rotate the front face two times so that the white color is not at the top of the cube, but at the bottom (where the white center is). Watch a visual application in the video below.
3. All other situations are solved by raising the die with the white side up (the side with the yellow center) and turning down to the white center as in point 2. Below is a video with illustrative examples.
I propose to assemble the first two layers in two steps. After assembling the white cross, our task is to install four corner cubes in their places, after which four more edge ones.
Like the assembly of the cross, this can all be done purely intuitively.
Installing corner cubes in the first (bottom) layer
For ease of perception of information, I will demonstrate how to install corner cubes.
To put the corner cubes in place, you need to learn one trick, which among the speedcubers is called “bang bang”. The formula for this looks like this R U R'U'. read here.
In the video, I looked at 4 situations that arise during the installation of corner cubes.
 The corner cube faces the white side to the right (we hold the cube with the white center down). Doing the U'F'UF form
  The corner cube faces the white side to the left (we hold the cube with the white center down). We carry out the form URU'R'.
  The corner cube looks up with the white side (we hold the cube with the white center down). We perform the form R U R’ U’ R U R’ U’ R U R’ U’ (three bang-bang) The corner cube is in its place, but turned upside down (we hold the cube with the white center down). We perform the form R U R’ U’ (one bang-bang), after which the corner cube will be on top (on the side with the yellow center). From this position, we perform one of the formulas described above.
 After setting all the corners in place, the cube should look like this:

Installation of rib cubes
After you have placed all the corner cubes in the bottom layer, our task is to put the edge cubes in their places. After that, the F2L stage will be completed.
The installation of rib cubes is carried out using one formula and its mirror execution. Before executing the formula, the main thing is to set the edge cube in the right place, this is done by turning the top layer.
The edge cube must be set so that the color of the side face matches the color of the central cube of the middle layer.
1. If after that the rib cube is to the left of its place, we execute the formula URUR 'U'F'U'F.

2. If the edge cube is to the right of its place, then we perform the mirror formula U'L'U'L UFUF'.

3. There are cases when the rib cubes are not in their places, or in their places, but at the same time turned upside down. The above formulas will help lift the rib cube to the top layer, after which you can easily install it in the right place.
After assembling the first two layers, it is necessary to assemble the side with the yellow center, this stage is called OLL. At the same time, our task is simply to collect the yellow side, at this stage it is not at all necessary that all the cubes be in their places.
We look at the video how to install rib cubes when assembling the first two layers
1. Corner
After you have collected the first two layers, the yellow side of the cube may look like this:

But in practice, during the assembly process, other combinations may fall out. Consider how to get out of all these situations using universal formulas.
Our task is to make a corner of the yellow cubes. After assembling the first two layers, you can see completely different combinations of yellow cubes at the top, but most often we get either a corner or nothing. Nothing means that neither a corner nor a cross nor a fish fell out. There are several possible combinations in the images that can be before the corner is assembled.
The corner is very easy to assemble. We carry out the formula: F RUR'U' F'. After executing the formula, you will get one of the many combinations that are possible with an OLL assembly that contains a corner. Let's move on to the next step.
2. Cross
The cross can be assembled using one formula, but only at the stage of the assembled corner. There can be many combinations based on the corner, but to assemble the cross you need to know only one formula. So, before assembling, you need to take the cube so that the corner vectors look: one to the left, the second looks up. Next, we execute the formula: F RUR'U' RUR'U' F' (turn the front, make 2 bang-bang and return the front). As a result, you will get one of the combinations based on the cross:

 After that, you can proceed to the assembly of the fish.
The last step of the Rubik's Cube -PLL
Since the instruction is for beginners, we will assemble this stage in two steps.
1. Arrangement of rib cubes in the upper layer
For this operation, there is a universal formula that will help us - RU'-RU-RU-RU'-R'U'-R2 (mirror version on the left: L'U-L'U'-L'U'-L'U- LU-L2). In the video, I tell you in which cases which formula to use.
2. Placement of corner cubes
In the video, I show you how to arrange corner cubes in two of the most common cases.
The formula for case one (the formula follows from the position shown in the video): R'U2RDR'U2RDR'U2RDDR'U2R
Formula for case 2 (the formula follows from the position shown in the video): R'U2RD2R'U2RD'R'U2RD'R'U2R
These formulas are easier to learn intuitively than just memorize.
Related publications
-
 Walking Dead: The Final Season walkthrough When will the walking dead second episode come out
In this walkthrough, only one of the options for passing the game is considered! + Described finding all collectibles. Episode 1:...
-
 Passage of the plot Truckers 3 secrets of the game
Third life behind the wheel, Three centuries without sleep. "You are not alone", group DDT Rassvet. A few hundred miles behind, pink mountains ahead, and behind them...